
Dealing with diaper leaks can be incredibly frustrating, especially when your baby has transitioned to larger sizes like extra-large (XL) tape diapers. At this stage of development, toddlers are highly active, constantly moving, bending, and exploring their surroundings. When an XL tape diaper leaks, the issue is rarely a simple matter of product quality; instead, it usually stems from a mismatch in fit, improper fastening techniques, or a shift in your baby’s body shape as they grow taller and leaner.
Understanding how to troubleshoot these leaks requires looking closely at how the diaper sits on your baby’s body. Premium tape diapers, such as Merries tape XL, are designed with advanced absorbent cores and flexible gathers, but even the most sophisticated designs require precise positioning to function effectively. By identifying where the moisture escapes and adjusting your fitting routine, you can keep your toddler dry and comfortable throughout the day and night.
Diagnose the Leak: Waist, Legs, or Saturation?
To solve the mystery of a leaking diaper, you must first act as a detective and identify exactly where the wetness is escaping. Diaper leaks generally fall into three distinct categories based on their location: the waistband, the leg openings, or overall saturation. Each of these trouble zones points to a different underlying issue that requires a specific adjustment.
Products mentioned in this guide

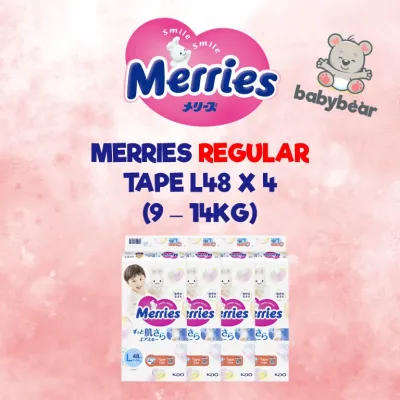


Prices are valid at publication and may change. Please refer to the product page for the latest price.
Waistband leaks typically occur at the back or the front of the diaper and are most common when your baby is lying down. If you notice wetness climbing up your baby’s back or stomach, it often indicates that the diaper is positioned too low or that the waistband is too loose. When a baby sits or crawls, a loose waistband gaps open, creating an easy pathway for liquid to escape before the absorbent core can draw it away.
Leg leaks are the most frequent complaint among parents and are almost always related to the elasticated leg cuffs. If moisture is escaping around the thighs, it is highly likely that the inner leak guards—the delicate fabric frills designed to stand upright—have become tucked inward during fastening. Alternatively, leg leaks can happen if your toddler has recently thinned out after starting to walk, leaving small gaps between the diaper’s elastic and their thighs.
Saturation leaks, on the other hand, occur when the diaper’s absorbent material has simply reached its maximum capacity. You can easily identify a saturation leak because the entire diaper will feel heavy, swollen, and cold to the touch, and moisture may seep directly through the outer breathable cover. This type of leak is common after long periods without a change, such as overnight, or when your baby is consuming a high volume of liquids.
Step-by-Step Guide to Fixing the Fit on XL Tape Diapers
Achieving a leak-free fit with XL tape diapers requires a systematic approach during every change. Because toddlers at this stage rarely lie still, mastering a quick and precise fastening routine is essential for busy parents. Using a structured fitting method ensures that the diaper’s protective features are fully deployed.

First, prepare the diaper by fully opening it and gently stretching the elastic leg gathers. This action activates the elastic tension, allowing the leak guards to stand upright. Slide the diaper under your baby, ensuring the back waistband sits high on their lower back, ideally just above the waistline. Pull the front of the diaper up firmly over their tummy, making sure the fabric is smooth and not bunched up.
Next, secure the fastening tapes symmetrically. Most high-quality tape diapers feature numbered guides on the front landing zone to help you achieve an even fit. Pull the tape firmly from the back and attach it to the corresponding number on both sides. If your baby has a round, prominent belly, angle the tapes slightly downward to secure the diaper snugly under the abdomen. If your baby has a slender waist but chunky thighs, angle the tapes slightly upward to tighten the fit around the leg openings.
Once the tapes are secured, perform the crucial leg cuff check. Run your fingers along the inside of the leg openings, pulling the outer frills outward. These frills must wrap around your baby’s thighs like a pair of shorts, creating a physical barrier against leaks. If the inner guards remain tucked inside, they will channel moisture directly outward onto your baby’s clothes.
Finally, verify the overall tension using the standard two-finger rule. Slide two fingers flat between the diaper’s waistband and your baby’s stomach. The waistband should feel comfortably snug against your fingers. If you can easily fit more than two fingers, the diaper is too loose and will likely sag or gap. If you struggle to slide your fingers in, the diaper is too tight and may cause discomfort or red marks.
Is XL Still the Right Size? When to Size Up or Switch to Pants
As babies grow, their body proportions change rapidly, meaning that the diaper size that fit perfectly last month may suddenly start leaking. Evaluating whether your baby is still in the correct size is a vital step in troubleshooting ongoing leakage issues.
Start by looking for physical indicators that your baby has outgrown their current XL tape diapers. If you notice deep red marks or elastic indentations around your baby’s thighs or waist, the diaper is too tight, even if the weight guidelines suggest otherwise. Another clear sign is the positioning of the fastening tapes; if you find yourself securing the tapes at the very outer edges of the landing zone (beyond the highest numbers), the diaper is too small.
It is also important to consult the manufacturer’s weight guidelines printed on the packaging, keeping in mind that these ranges are general recommendations. Because every baby has a unique body shape—some are tall and lean, while others are shorter with rounder bellies—weight alone does not guarantee a perfect fit. If your baby is near the upper limit of the XL weight range, transitioning to a larger size can provide the extra absorbency and coverage needed to stop leaks.
For highly active toddlers who refuse to lie still during changes, switching from tape diapers to pants-style diapers can be a game-changer. Pants-style diapers feature a highly flexible, 360-degree elastic waistband that conforms to your baby’s movements, eliminating the risk of tapes loosening or shifting during active play. They are also much easier to pull on and off while your toddler is standing, making diaper changes less of a struggle.
Preventing Leaks During Sleep and Active Play
Different daily activities place different demands on a diaper’s fit and absorbency. By making minor adjustments based on whether your baby is sleeping or playing, you can significantly reduce the risk of unexpected leaks.
Nighttime requires maximum absorbency and a secure fit that can withstand hours of movement in bed. Always change your baby into a fresh diaper right before they go to sleep. If your baby is a stomach sleeper, gravity will cause urine to pool at the front of the diaper; to counter this, pull the front of the diaper slightly higher before fastening the tapes. For back sleepers, ensure the back waistband is pulled up high to prevent leaks when they are lying flat.
During the day, active play can cause even a well-fitted diaper to shift out of place. Crawling, climbing, and running put constant pressure on the diaper’s elastics. Make it a habit to check the diaper’s alignment after periods of intense activity. If you notice the diaper sagging or shifting to one side, take a moment to re-adjust the tapes and pull the leg cuffs back into place to maintain a secure barrier.
Frequently Asked Questions (FAQ)
Can I use diaper booster pads with XL tape diapers?
Diaper booster pads can be used to increase absorbency, particularly overnight, but they require careful placement. When inserting a booster pad, ensure it lies completely flat within the diaper’s core and does not overlap or flatten the elasticated inner leak guards. If the pad is too bulky, it can push the diaper away from your baby’s body, creating gaps at the legs and waist that actually increase the likelihood of leaks. Always verify that the diaper still fits comfortably and securely after adding any insert.
Why does the diaper leak only on one side?
Leaking consistently on one side is usually a sign of asymmetrical fastening or a specific sleeping posture. If one tape is fastened higher or tighter than the other, the diaper will sit crookedly on your baby’s body, leaving a gap on the looser side. Additionally, if your baby prefers to sleep on one side, gravity will pull liquid to that side of the diaper faster than the core can distribute it. To fix this, ensure you use the numbered guides on the front landing zone to fasten the tapes perfectly symmetrically, and double-check that both leg cuffs are fully flared out.

Community discussion
Share your experience or ask a question. Comments are reviewed before publication.